Tile and Grout Cleaning
The Ultimate Guide to Clean Tile and Grout the Right Way for a Fresh, Spotless Home
If you’ve ever looked at your tiled floors or bathroom walls and noticed dullness, stains, or grime buildup, you’re probably wondering, “How do I get my tile and grout truly clean?” Well, you’re not alone! Many homeowners struggle with maintaining the sparkle of their tiles and grout lines, but the good news is that with the right know-how, you can transform your space into a cleaner, healthier environment. In this comprehensive guide, we’ll walk through everything you need to know about tile and grout cleaning—the right techniques, tips, and tools—to keep your home looking its best. Whether you’re tackling a small kitchen backsplash or a large tiled surface, this guide will help you do it right!
Why Proper Tile and Grout Cleaning Matters
Before diving into the how-tos, let’s talk about why it’s so important to clean tile and grout properly. Dirt, grime, mold, and bacteria can accumulate on and between tiles, especially in high-moisture areas like bathrooms and kitchens. Over time, this buildup can lead to discoloration, unpleasant odors, and even health issues.
Regularly cleaning your tile and grout not only enhances the look of your space but also prolongs the lifespan of your tiles. Plus, deep cleaning can help prevent stains and the need for costly repairs or replacements down the road.
Tools and Supplies You’ll Need
Getting professional results at home requires the right tools and supplies. Here’s what you should gather before you start:
- Wide-bristle scrub brush or grout brush
- Soft cleaning cloths or microfiber towels
- Vacuum or dry mop (for loose dirt)
- Tile and grout cleaning solutions (DIY or store-bought)
- Spray bottle
- Hot water
- Bleach or hydrogen peroxide (for stubborn stains, optional)
- Sealant (to protect your grout after cleaning)
Step-by-Step Guide to Cleaning Tile and Grout
1. Prepare Your Area
Start by removing loose dirt and debris. Use a vacuum or dry mop to sweep the surface thoroughly. This step prevents scratching the tiles when you begin scrubbing and ensures you’re working on a clean surface.
2. Choose Your Cleaning Solution
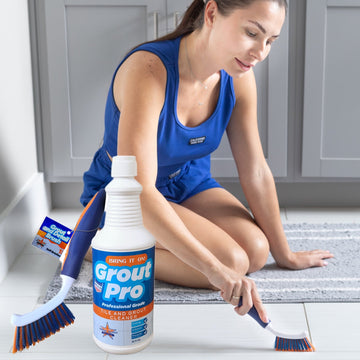
For general maintenance, a simple mixture of warm water and a few drops of mild dish soap can do wonders. For tougher stains or grime buildup, consider a specialized tile and grout cleaner, or make your own DIY solution: This is the best grout cleaner
- DIY solution: Mix equal parts baking soda and water to form a paste, or create a mixture of vinegar and water (but avoid vinegar on natural stone tiles).
- Store-bought options: Look for trusted brands formulated specifically for tile and grout cleaning.
3. Apply the Cleaning Solution
Spray or apply the cleaning solution generously over your tiles and grout lines. Let it sit for 5-10 minutes—this allows the solution to loosen dirt and grime.
4. Scrub Areas Thoroughly
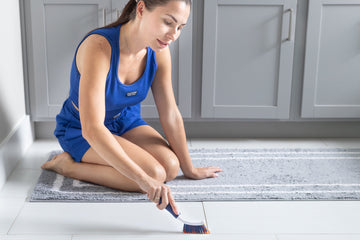
Using your grout brush or scrub brush, work in circular motions to agitate the grout lines and tiles. Pay extra attention to stained or discolored areas. For stubborn stains, you might need to reapply the cleaner and scrub a bit more vigorously.
5. Rinse and Wipe
Wipe down the tiles with a clean, damp cloth or mop to remove loosened dirt and residue. Use clean water to rinse and prevent soap or cleaner buildup.
6. Dry and Inspect
Dry the surface with a microfiber towel. This step is crucial to prevent water spots and to better assess whether further cleaning is necessary.
Handling Tough Stains and Mold
Some stains or mold may resist initial cleaning. In these cases, consider using stronger solutions:
- For mold or mildew: Use a mixture of hydrogen peroxide or a commercial mold cleaner. Apply, scrub, and rinse thoroughly.
- Deep stains: A paste of baking soda and hydrogen peroxide can be applied directly to stains, then left for 10-15 minutes before scrubbing.
Always wear gloves and ensure proper ventilation when working with strong chemicals.
Protecting Your Grout with Sealant
Once your tile and grout are spotless, consider applying a grout sealant. This creates a protective barrier against dirt, moisture, and stains. Proper sealing significantly extends the cleanliness of your tiles and reduces maintenance needs.
To seal your grout:
- Ensure the grout is completely dry after cleaning.
- Apply the sealant evenly using a brush or spray applicator.
- Allow it to cure as per the manufacturer’s instructions, usually 24 hours.
Maintenance Tips for Long-Lasting Cleanliness
- Clean spills promptly to prevent staining.
- Regularly sweep or vacuum to remove loose dirt and debris.
- Wipe down tiles weekly using a damp cloth or mop with mild cleaning solution.
- Reapply grout sealant every 1-2 years for optimal protection.
When to Call Professionals
While DIY methods can handle most cleaning tasks, some situations might require professional tile and grout cleaning services. If your grout is heavily stained, mold-infested, or if you’re dealing with large areas or delicate natural stone tiles, professional cleaners have specialized equipment and solutions that can restore your tiles without damage.
Final Thoughts
Achieving pristine tile and grout might seem challenging at first, but with the right tools, techniques, and a bit of routine maintenance, you can keep your surfaces looking brand new. Remember, consistent cleaning and timely sealing are your best allies in maintaining a fresh, healthy home environment. So, grab your scrub brush and start transforming your space today!